
Adobe Creative Cloud provides access to industry-leading creative and productivity applications that support teaching, learning, research, and professional work. With your Georgia Tech Adobe license, you can:
- Create and edit documents with Adobe Acrobat Pro.
- Design graphics and illustrations using Adobe Photoshop and Adobe Illustrator.
- Edit videos with Adobe Premiere Pro.
- Create digital publications with Adobe InDesign.
- Access cloud storage and synchronize projects across devices.
- Collaborate and share creative assets with colleagues and students.
- Receive the latest updates and features through the Creative Cloud Desktop application.
Use the steps below to install Adobe Creative Cloud and any Adobe application on your Georgia Tech-managed computer.
Step 1: Open SelfService+ and Find Adobe Creative Cloud
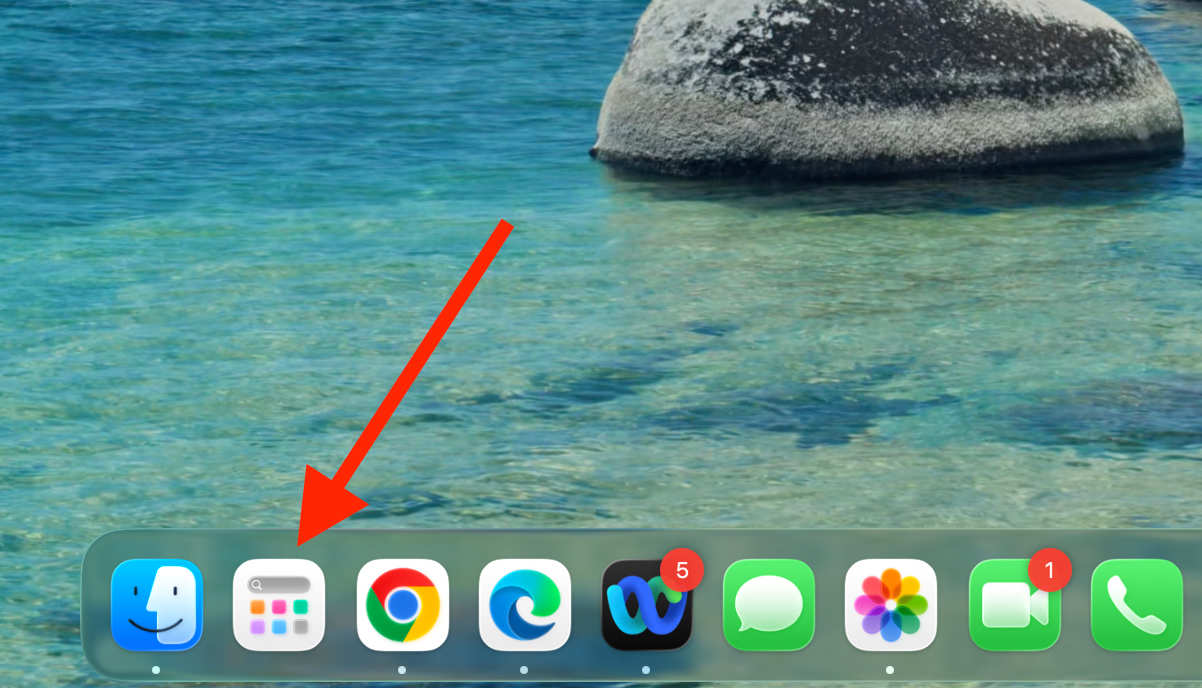
- Open SelfService+ from Apps.
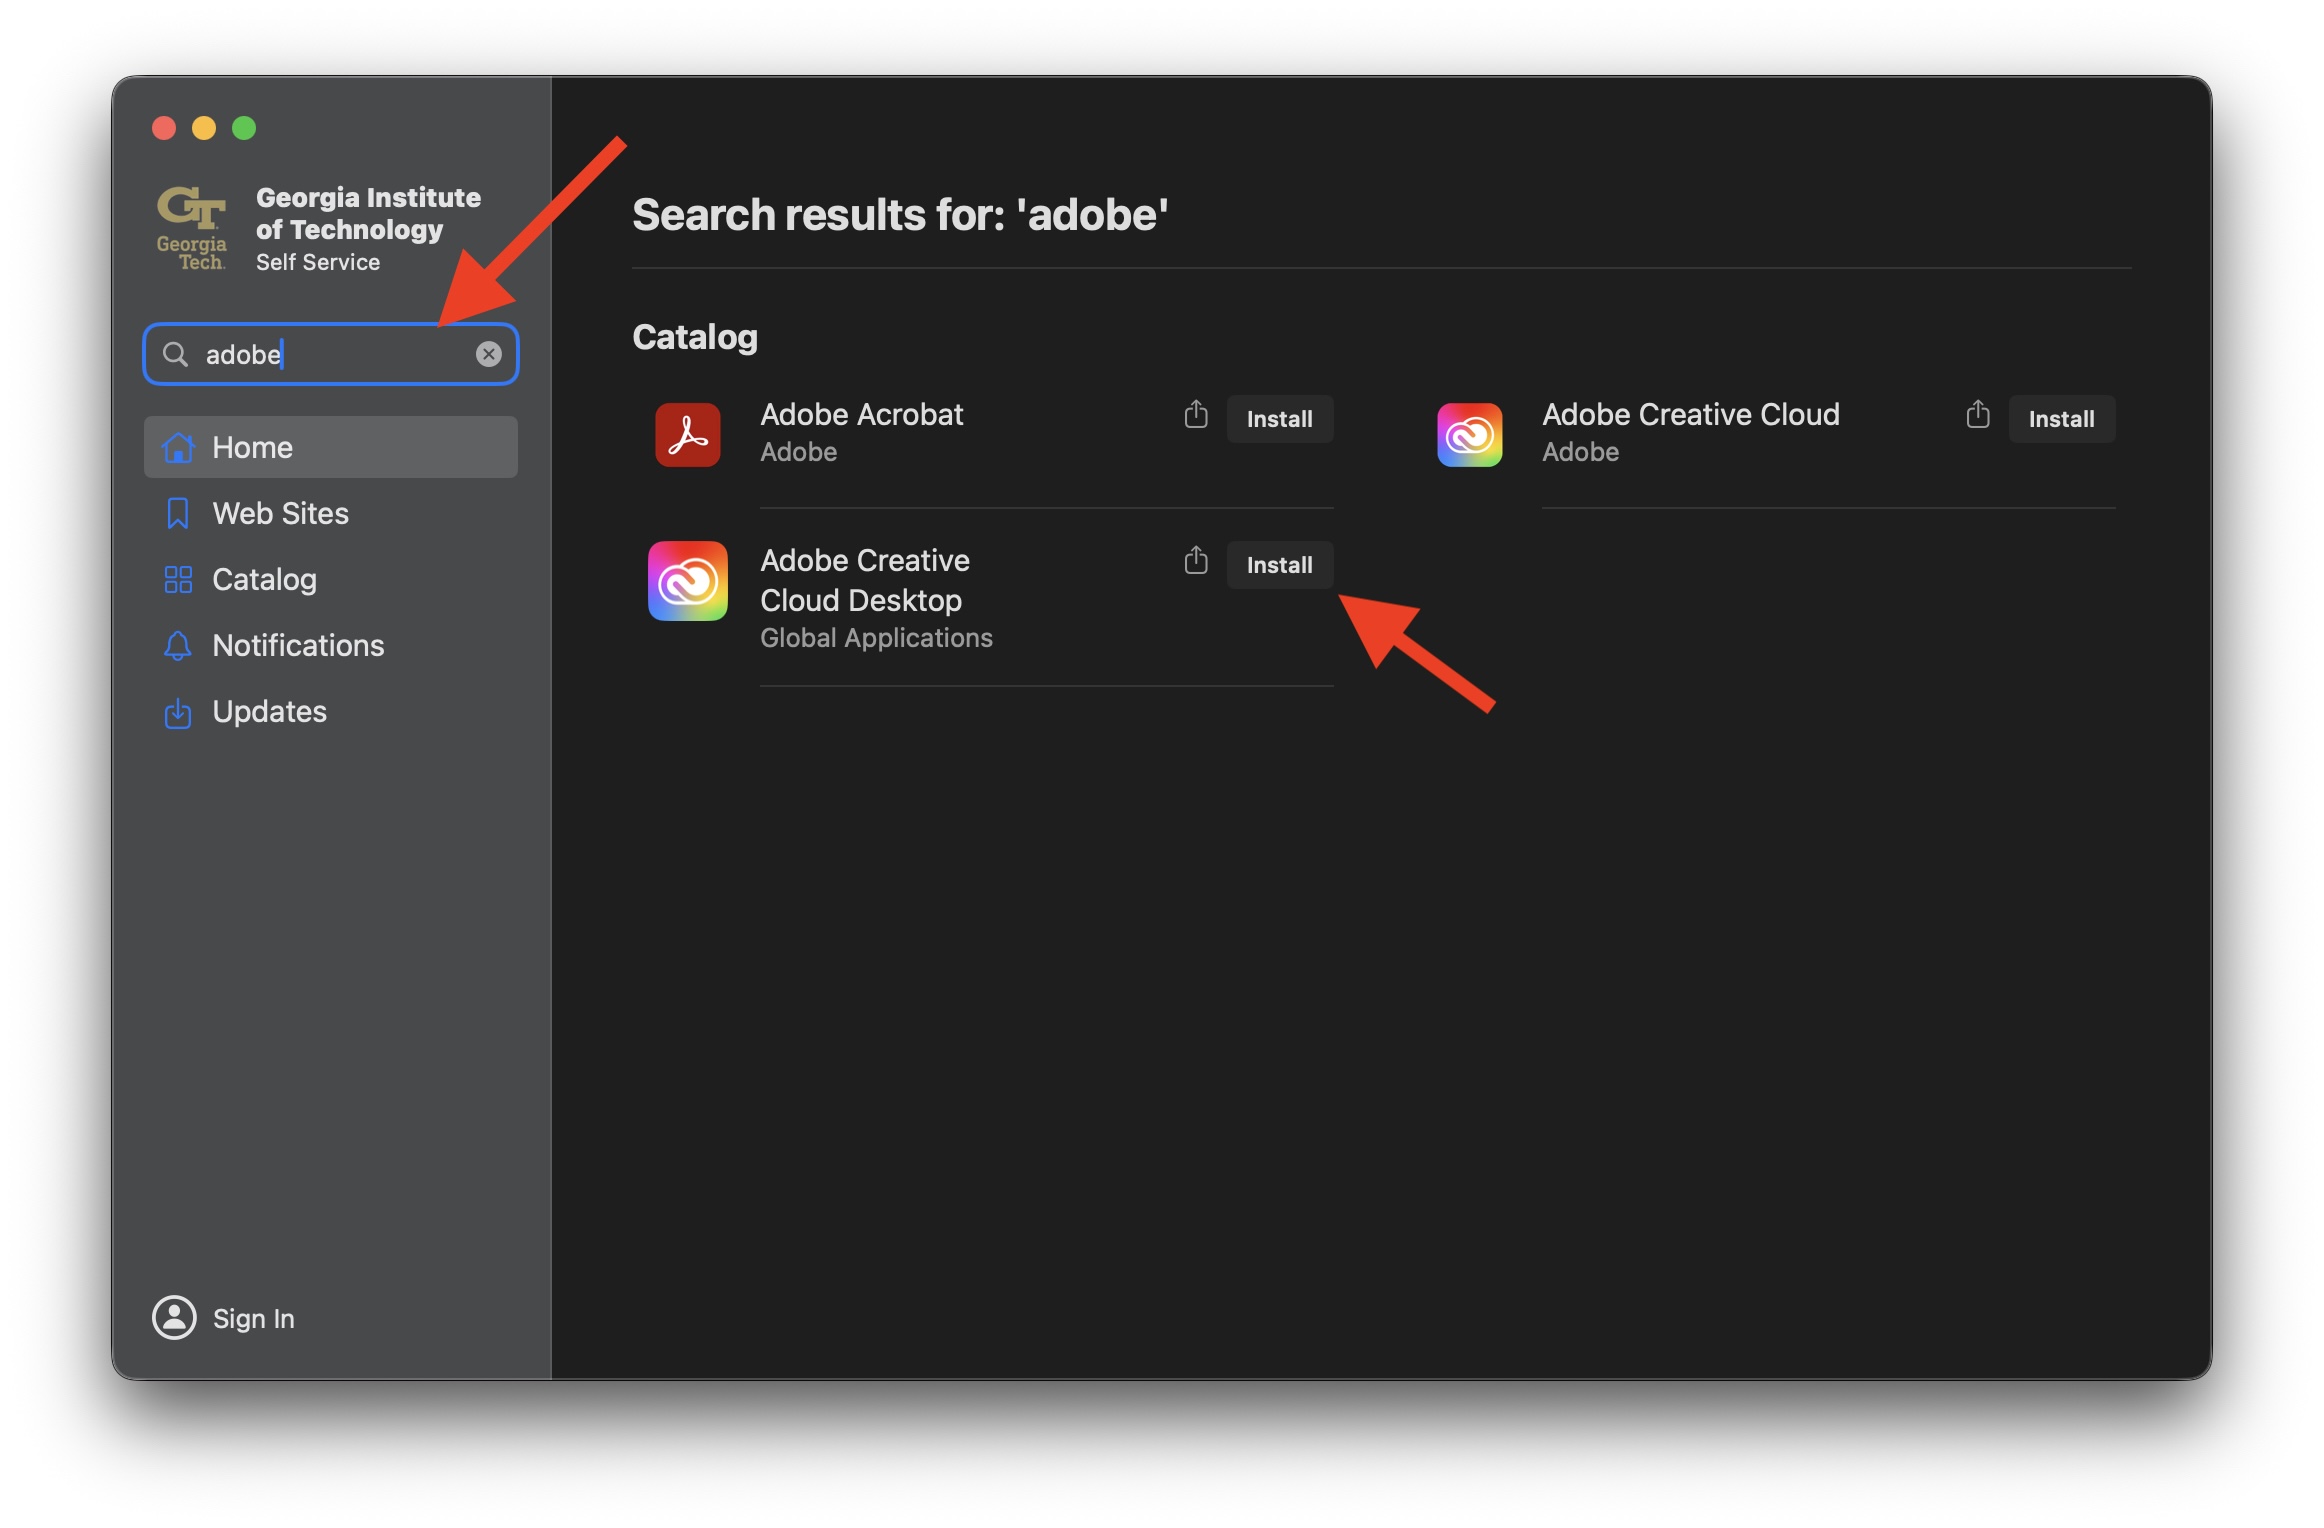
- Locate or search Adobe Creative Cloud Desktop in the list of available applications.
- Click the Install button.
Step 2: Sign In with Your Georgia Tech Account
- Launch Adobe Creative Cloud Desktop after installation.
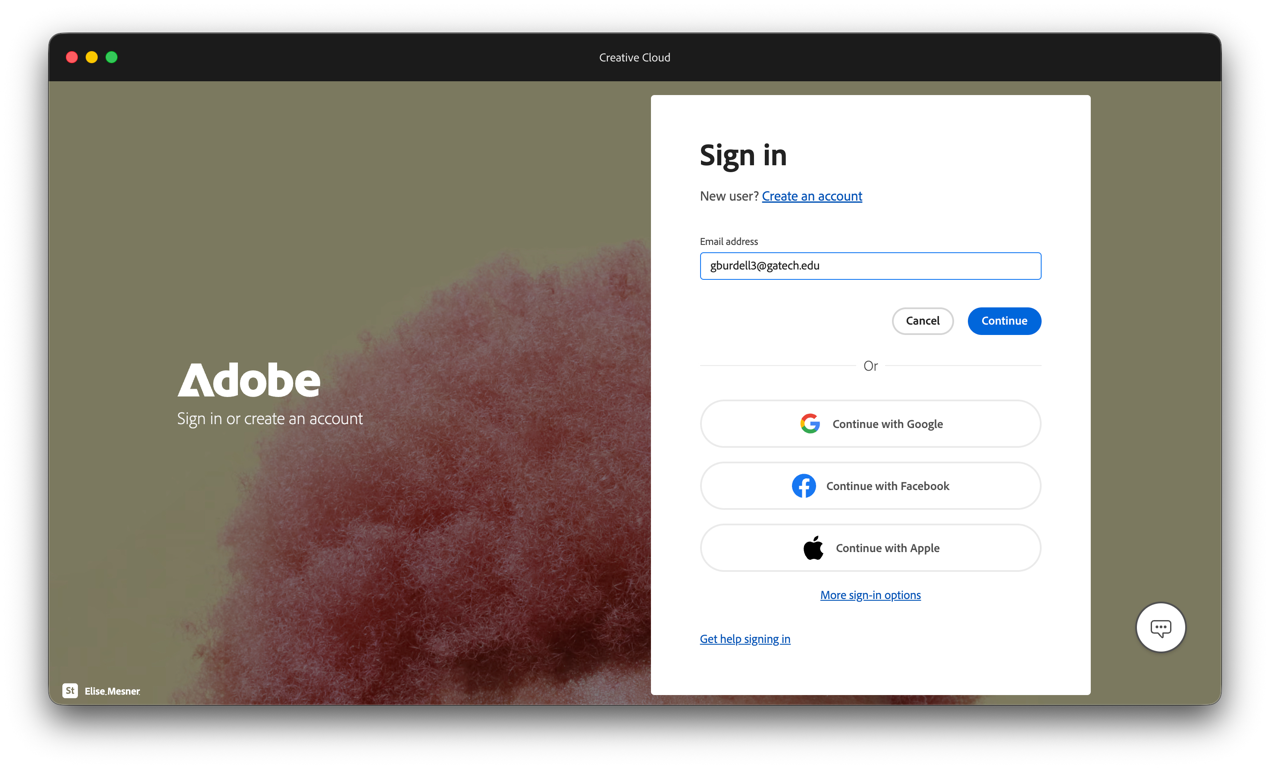
- Enter your Georgia Tech email address (GTUsername@gatech.edu).
- Click Continue.
- You will be redirected to the Georgia Tech Single Sign-On (GT SSO) page.
- Sign in with your Georgia Tech credentials and complete any required Duo/Multi-Factor Authentication (MFA) prompts.
- After successful authentication, Adobe Creative Cloud will open and your account will be activated.
Note: You must sign in using your Georgia Tech (@gatech.edu) account to access licensed Adobe applications.
Step 3: Install an Adobe Application
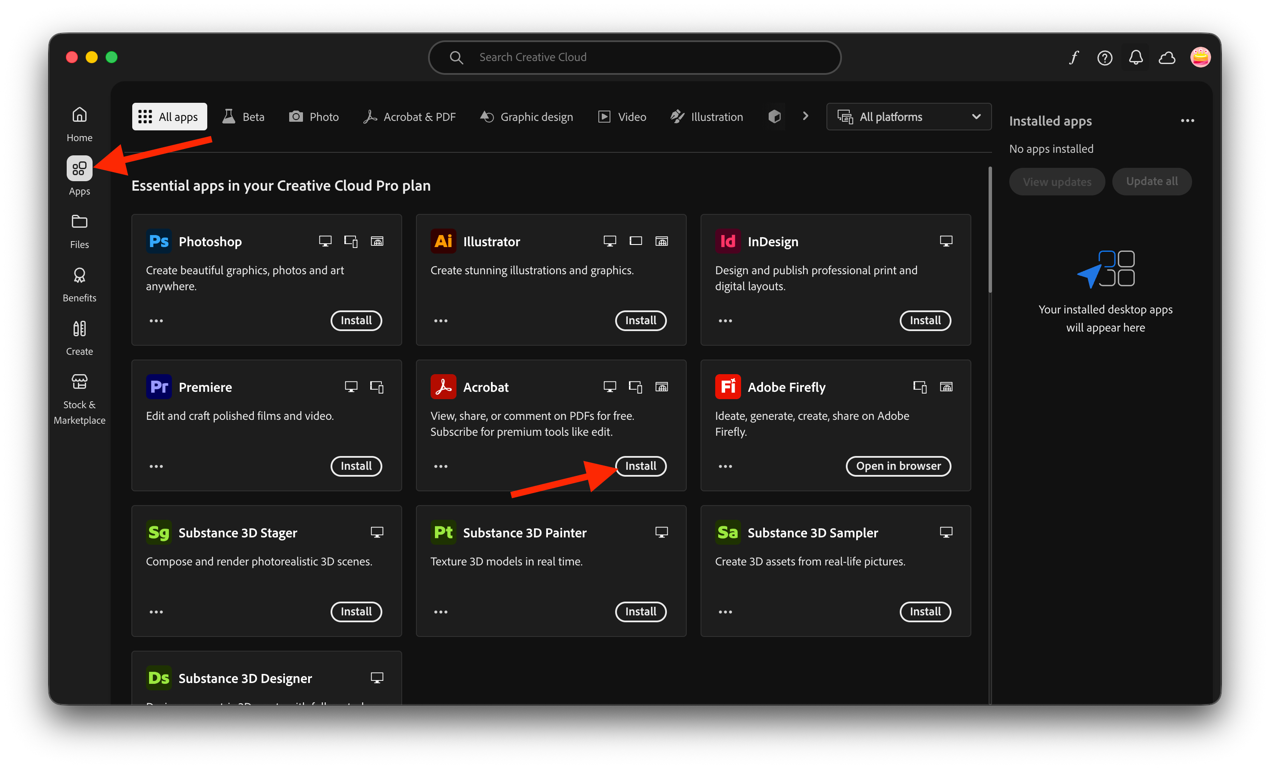
- After signing in, the Adobe Creative Cloud Desktop app will display the available Adobe applications.
- Browse the application list and select the Adobe product you need (such as Photoshop, Illustrator, Acrobat, Premiere Pro, or InDesign).
- Click Install next to the desired application.
- Wait for the installation to complete before launching the application.
Tip: Set Adobe Acrobat as the Default PDF Viewer
After installing Adobe Acrobat, you can make it the default application for opening PDF files.
- Find any PDF file on your Mac.
- Right-click (or hold Control and click) the file.
- Click Get Info from the menu.
- Go to the Open with section and click the menu.
- Pick Adobe Acrobat.
- Click Change All.
- Click Continue to save the choice for all PDF files.