Installing the uniFLOW Mac Client on a TSO-managed machine
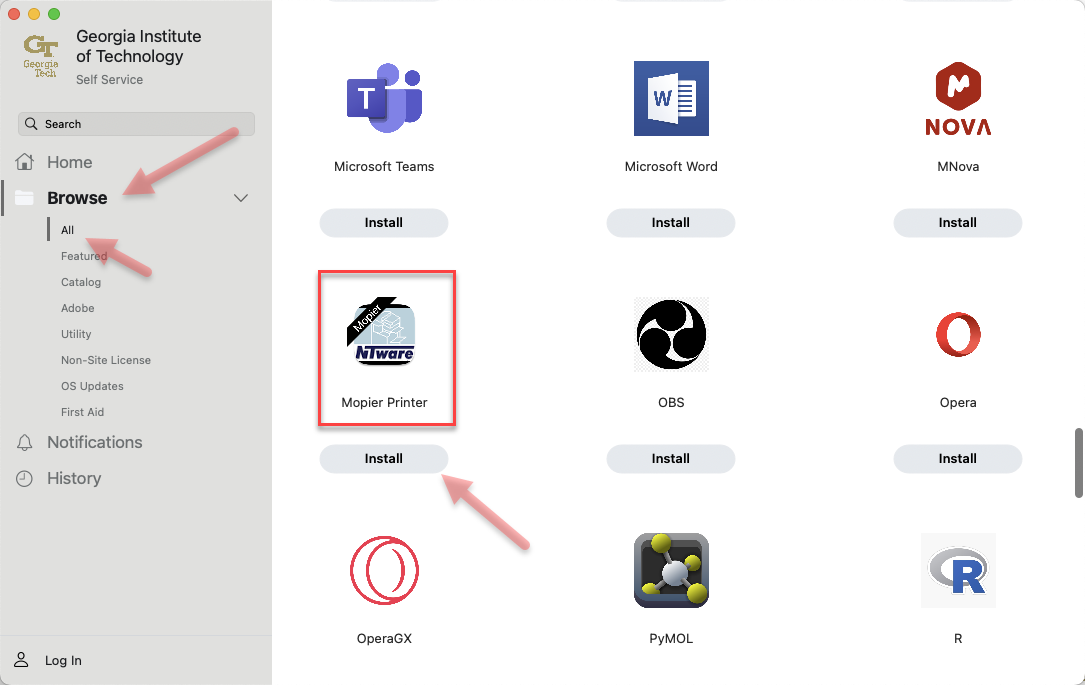
- Open Self Service app located on Launchpad
Select Browse -> All, look for Mopier Printer then hit Install
- Skip forward to the "To print a document" section
Installing the uniFLOW Mac Client on a TSO non-managed machine
- Download The PWClient using this Link
- Double-click the disk image.
- Complete the installation.
- If prompted, Enter server name: hollister.cc.gatech.edu.
- If prompted, Enter remote printer queue: input-mac.
- If prompted, Enter local queue: input-mac.
- Double click on the application; it will be running from the top menu.
- Select uniFLOW user : Enter %u
- Select uniFLOW server: Enter Hollister.cc.gatech.edu
- Select Preferences:
- Log File name: Leave Blank.
- uniFlow Server: Hollister.cc.gatech.edu.
- Check Pop up for every job.
- Select Save.
Installing the printer:
- Go to System Preferences
- Printers & Scanners
- Select the + sign to add a printer
- Select IP.
- Address: hollister.cc.gatech.edu
- Protocol: Line Printer Daemon – LPD
- Queue: input-mac
- Location: Leave Blank
- Use: Select Generic PostScript Printer
- Go to Users and Groups
- Select your user account
- Select login items
- Select the + sign to add a startup item
- Search for "MacClient" and select it
- The UniFlow MacClient will now start at login and will not require the user to manually start it
To print a document:
- Make sure the uniFLOW mac client is running.
- uniFLOW, double click mac client.
- A uniFLOW mac client icon will appear in the menu bar.
- Select uniFlOW mac client in the menu bar.
- Drop down menu, choose preferences.
- Select Pop up for every job.
- Select Save.
- File > Print your document.
- Printer: Select Hollister.cc.gatech.edu
- Menu screen pops up uniFLOW Job Code
- User Name: Enter GT ID Credentials
- Password: Leave Blank
- Select OK/Close.
- Select the appropriate printer options if needed.
- Select OK/Close.
You may then walk up to any of the mopiers. Scan your buzzcard. If this is your first time, you will be prompted to enter your GT user name and password (you are only required to do this once).
You should then be able to view all jobs currently in the queue.
Select the job(s) you would like to print and select Print and Delete.