The following steps require Administrative permission on the host computer. Faculty and Staff that need assistance installing the CoC Mopiers should reach out to the Help Desk at helpdesk@cc.gatech.edu.
Driver Install:
- Download the Mopier Driver.
- Run the ‘Setup’ for the ‘MomUdSetup_2019LTS_SR1_WHQL’ file that was extracted
- Confirm that ‘English (United States)’ is selected and click ‘Next’:
- Click ‘Next’ on the ‘Welcome to InstallShield Wizard for uniflow Universal Driver’
- Accept the License Agreement and click ‘Next’
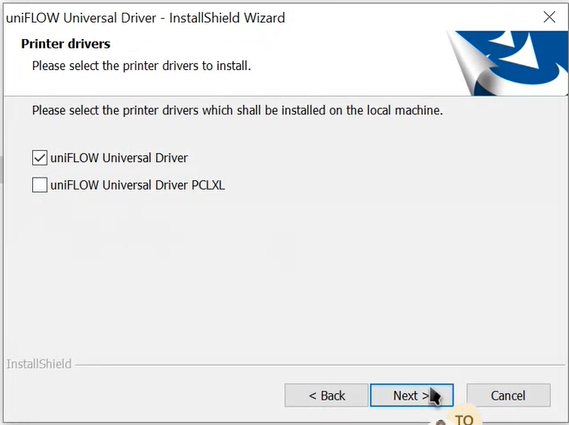
- Uncheck the ‘uniflow Universal Driver PCLXL’ and click ‘Next’
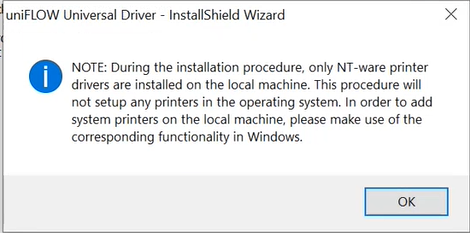
- Click ‘OK’ on the ‘uniFLOW Universal Driver – InstallShield Wizard’ pop-up.
- Driver will begin to install.
- Click on ‘Finish’ to complete the driver install.
Printer Setup:
- Select the Start button, then select Settings > Devices > Printers & scanners.
- Select Add a printer or scanner > Scroll down and click on The printer that I want isn't listed
- Select ‘Add a printer using a TCP/IP address or hostname’ , then select ‘Next’.
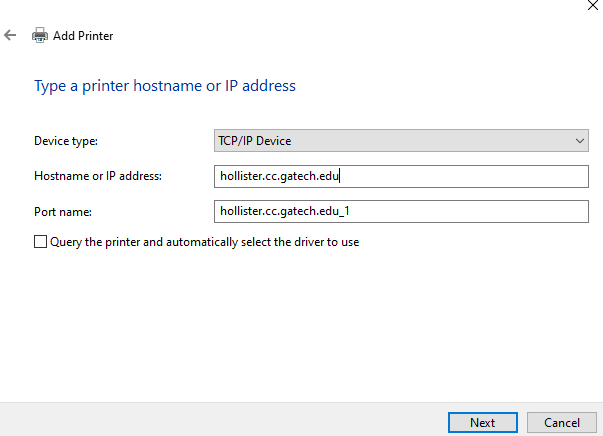
- Select 'TCP/IP Device' in the 'Device type' list. Uncheck 'Query the printer and automatically select the driver to use'
- Type the hostname or the IP address of the printer. Select 'Next'.
- Hostname: hollister.cc.gatech.edu
- Windows will detect the printer and configure it correctly.
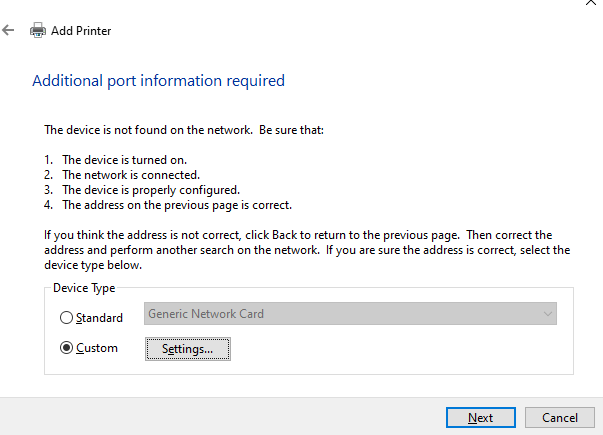
- On the ‘Additional Port information required’ screen, select Custom and Click ‘Settings’
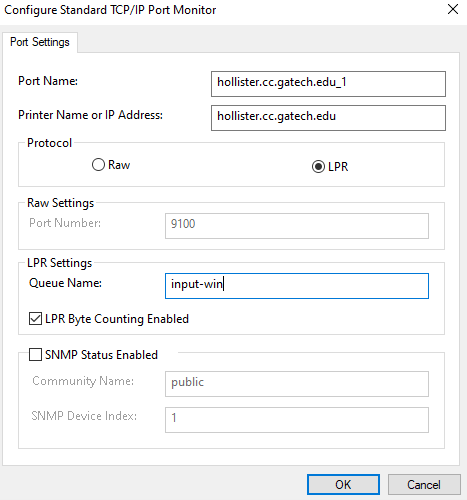
- In ‘Settings’ on the ‘Configure Standard TCP/IP Port Monitor’ screen, input the following information and click 'Ok' to save, then ‘Next’ to proceed:
- Protocol = LPR
- LPR Settings
- Queue Name = input-win
- Select LPR Byte Counting Enable
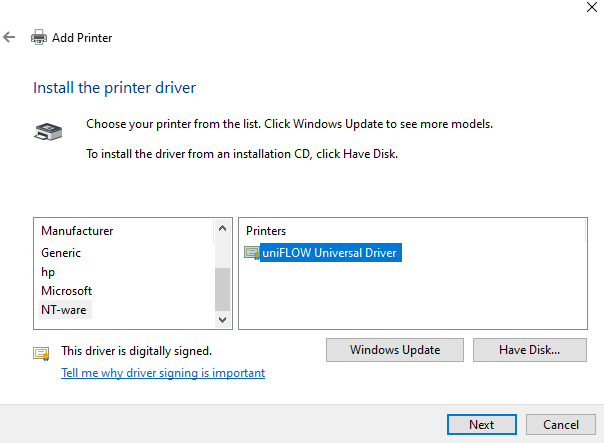
- Select ‘NT-ware’ for ‘Manufacturer’ and ‘uniFLOW Universal Driver’ for ‘Printers’ on the ‘Install the printer driver’, Select ‘Next’.
- Select ‘Replace the current driver’ and Select ‘Next’.
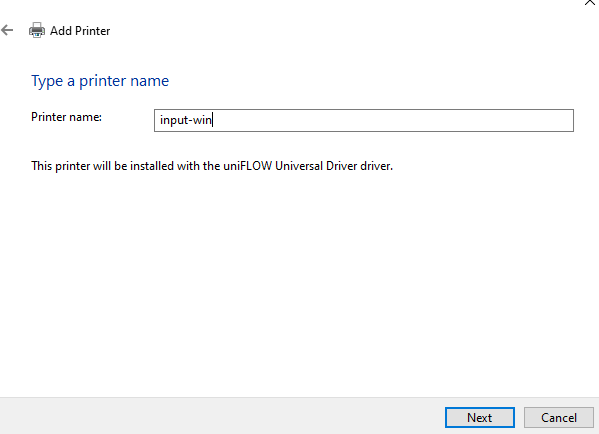
- Enter ‘input-win’ in the ‘Printer name’ field and select ‘Next’
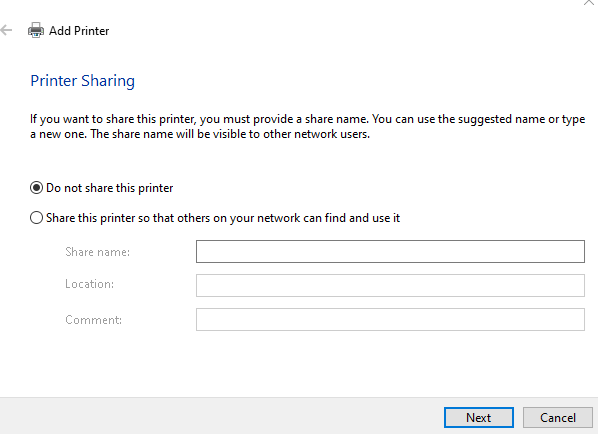
- Select "Do not share this printer" on the "Printer Sharing" window.
- Select ‘Next’ on the ‘Printer Found’ window and select ‘Finish’ on the ‘Successfully added input-win’ window.
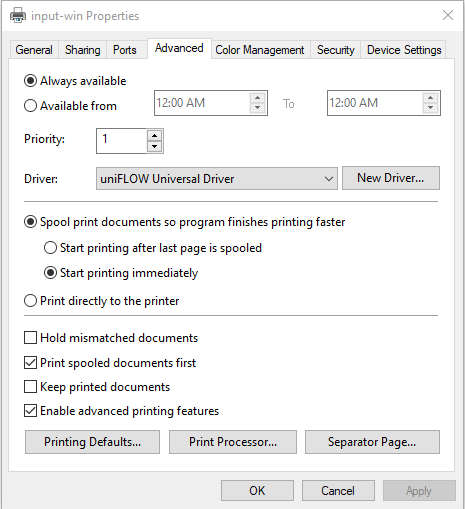
- In the ‘Printers & Scanners’ window. Select ‘input-win’ > Manage > Printer properties
- In the ‘input-win’ Properties window, Select the ‘Advanced’ tab > Print Processor.
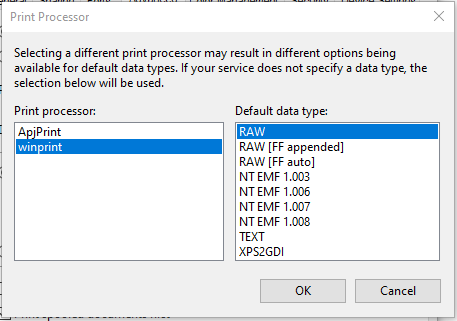
- In the ‘Print Processor’ window, Select ‘winprint’ and Click ‘OK’
- In the ‘input-win’ Properties window, Select ‘Preferences’ and wait on this screen for 15 seconds and Click ‘OK’
- Print a Test Page to confirm that the printer was setup successfully.