TSO provides CrashPlan client software licenses to CoC faculty, staff, and student employees with GT-owned mobile computing devices, such as laptops, tablets and phones. The CrashPlan client leverages the campus backup service administered by OIT.
Download and Installation and Setup
You can download, install and setup the CrashPlan client by following the directions here:
Choosing Your Backup
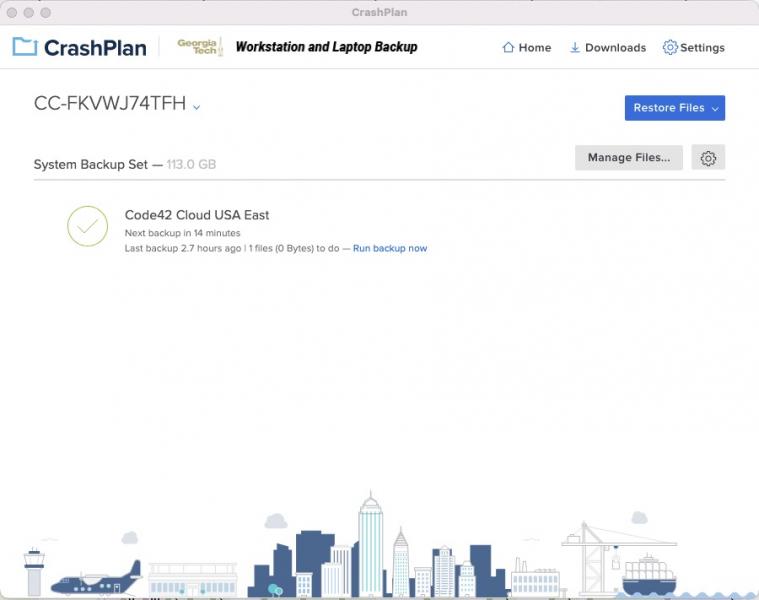
Each time you open CrashPlan, it will prompt you to login. Type your full GT username (for example: gburdell2@gatech.edu) and you will be redirected to the standard Georgia Tech login screen. When signed into for the first time, CrashPlan will immediately begin backup of the entire user folder of whichever user account began the installation. The initial backup process can take considerable time, depending on how much data exists (e.g., 50GB of data will take approximately 1 day per backup server). It is recommended to use a wired network connection for the initial backup to expedite this operation.
The Destinations should be left at their default values. If you wish to change what folders and files are being backed up, click the 'Manage Files...' button to bring up the below window.
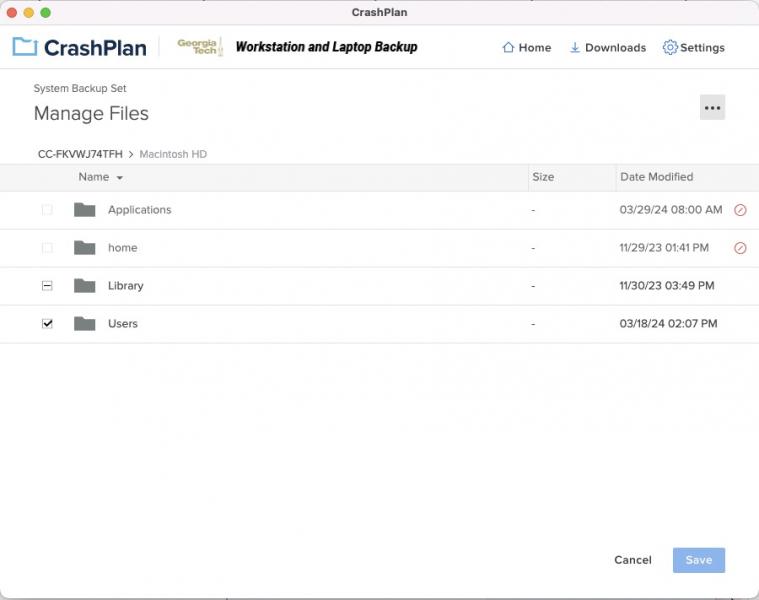
Tick the checkboxes of the files or folders you wish to have backed up and then click Save. Once done, CrashPlan will execute a backup. The length of time required will vary based on how much data is being backed up, but the Backup screen above will show a progress bar and an estimated time of completion.
Restore
To restore files, open the CrashPlan application and select the Restore Files button.
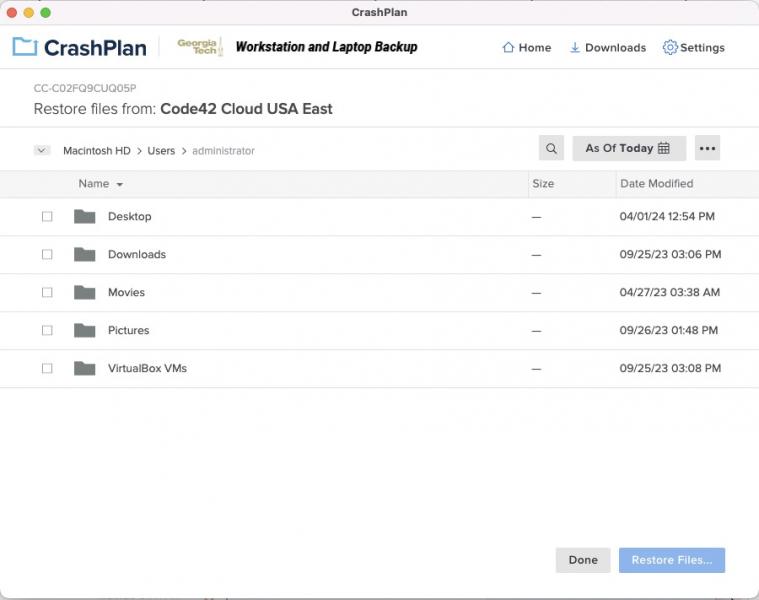
If you have multiple computers being backed up, you can select from which you want to restore. If you know the name of the file or folder, you can use the search field. If not, you can select it from the list shown by ticking the checkbox next to that which you want to restore. At the top, the "As Of Today" link will open a date selection menu. Clicking 'Restore Files...' again will bring up the options for the restore - where you want to save the restored files, what to do if the file already exists, and file permissions settings. Once you've selected what you want restored, click the 'Go' button.